Getting It Online
Although Internet access is not strictly essential for some basic Lumitrix indoor functionality, such as video scheduling or on-site multiple projector setup (chaining a number of projections into a single big synchronized and edge-blended projection) and this might be perfectly sufficient for long-term projection mapping installations, many of the advanced features require the device to be online. There are three main channels that can be used for this matter. If you are behind NAT, firewall or are dealing with a more complex corporate network, please consult your network administrator and the troubleshooting section of this guide.
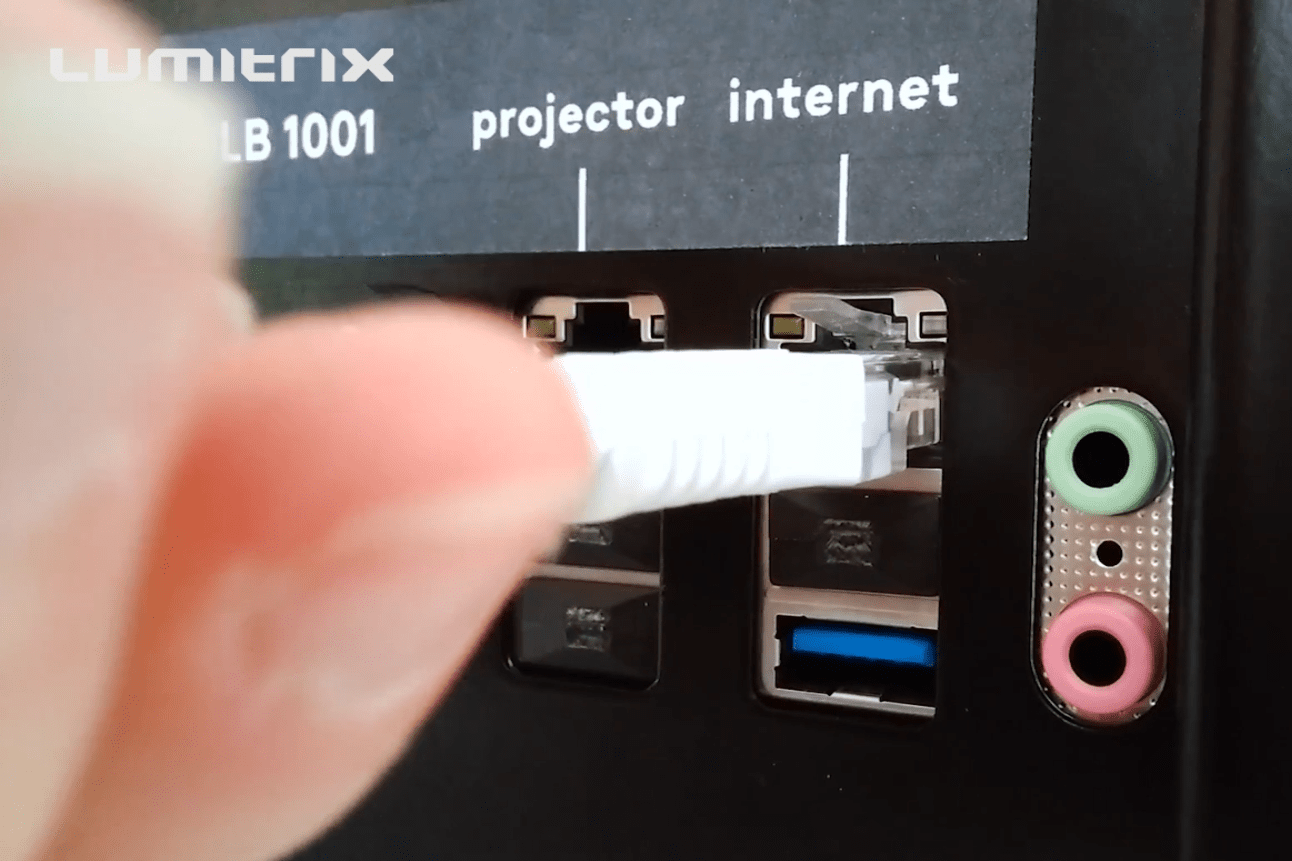
LAN Cable (RJ45)
The most straightforward way to connect your device to the internet is to use UTP (or LAN) cable and plug it onto the RJ45 socket closest to the audio jacks. This method will work straight away (no restart is needed) as with any other network device or computer, provided there is a DHCP service running on the network (very common these days) and there are no advanced authentication measures in place (i.e. RADIUS server, MAC filtering) and VPN traffic should not be filtered or blocked. This can be an issue on some tight corporate networks - ask your network administrator for help.
Wi-Fi connection
Alternatively, you can connect your device to the local network via wireless access. The same general rules as for wired connection apply (DHCP, no advanced authentication, VPN traffic allowed). However, by default Wi-Fi is acting as a hotspot to access the WebGUI configuration and scheduling functionality. This needs to be overridden by accessing the WebGUI:
- Settings Tab → Control Setup → Wi-Fi Picker
To learn how to use this settings, please navigate to corresponding section of the Quick WebGUI Overview.
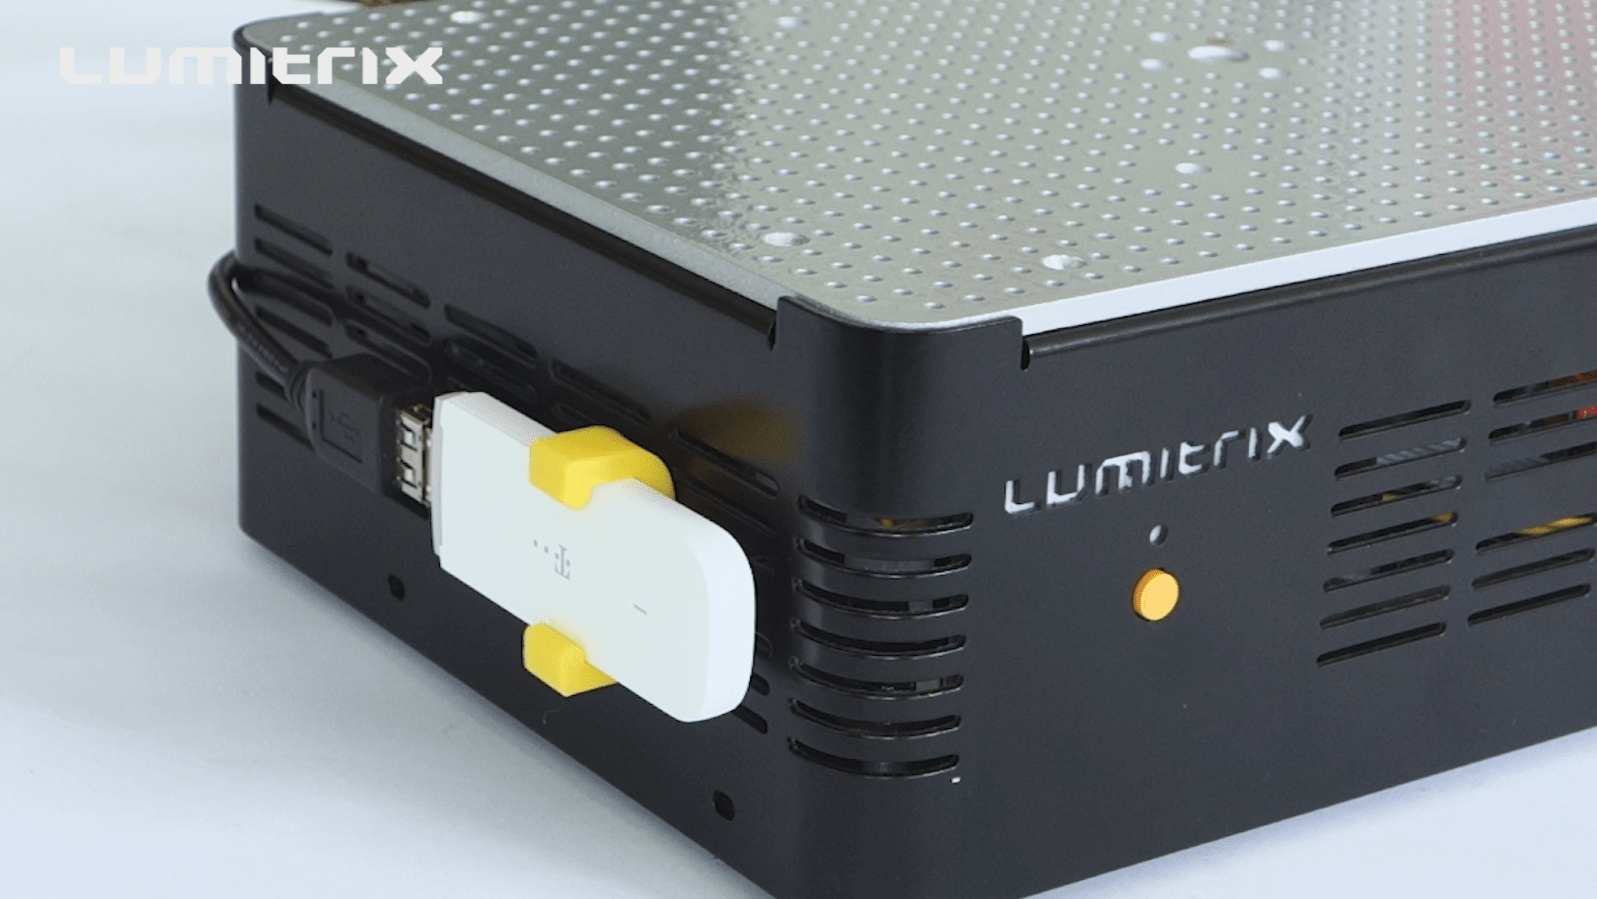
GSM/3G/LTE Modem
The final way to connect Lumitrix indoor to the Internet is to use accompanied GSM modem. Before you insert your data SIM, make sure it is activated and the PIN protection is removed. Also, if the access settings of your mobile provider are different than “APN:INTERNET, ID:blank PASS:blank” (common for many European GSM providers), you will need to contact your provider for these settings and set them using the WebGUI (read the WebGUI section of this manual). The modem is meant to be plugged into an USB connector on the back panel that does not come covered and at the same time using an USB extension cable and attaching the modem to to one of the three attachment points on the chassis of the device as seen in the instructional video. Failing to do so may prevent the modem or the whole device from working correctly due to the electromagnetic interference caused by the outbound GSM signal. If you want to learn more about the meaning of LED states of the modem, please refer to Status LED Color and States section of this manual.